Съемники проводов are essential electrical hand tools used to safely remove insulation from electrical wires without damaging the conductive core. According to the NFPA 70E Standard for Electrical Safety in the Workplace and Ugly’s Electrical References, using a wire stripper properly reduces the risk of electrical failure, improves connection reliability, and ensures compliance with electrical safety standards in residential, commercial, and industrial wiring applications.
Introduction: Why Wire Strippers Matter in Modern Electrical Work
All electrical systems are based on one fundamental requirement: reliable conductive connections. Whether it’s household wiring, automotive systems, telecommunications, or industrial machinery, every electrical connection begins with the critical step of cleanly and precisely removing insulation from a wire.
This is where the wire stripper becomes indispensable.
This precision hand tool is designed to remove the plastic or rubber insulation surrounding a conductor without nicking, cutting, or weakening the metal core inside. Although it may seem straightforward, using incorrect stripping techniques is one of the main causes of electrical faults, including intermittent connectivity, overheating, voltage drops, and fire hazards.
In professional electrical engineering practice, correct wire preparation is considered part of baseline electrical safety compliance, as highlighted in NFPA 70E safety guidelines. Poorly stripping a wire can reduce its conductivity efficiency by up to 30% due to strand damage or improper terminal contact pressure.
This guide covers all aspects of wire stripper use, including tool types, correct handling techniques, matching wire gauges, safety standards, common mistakes, professional tips, and real-world applications across industries.

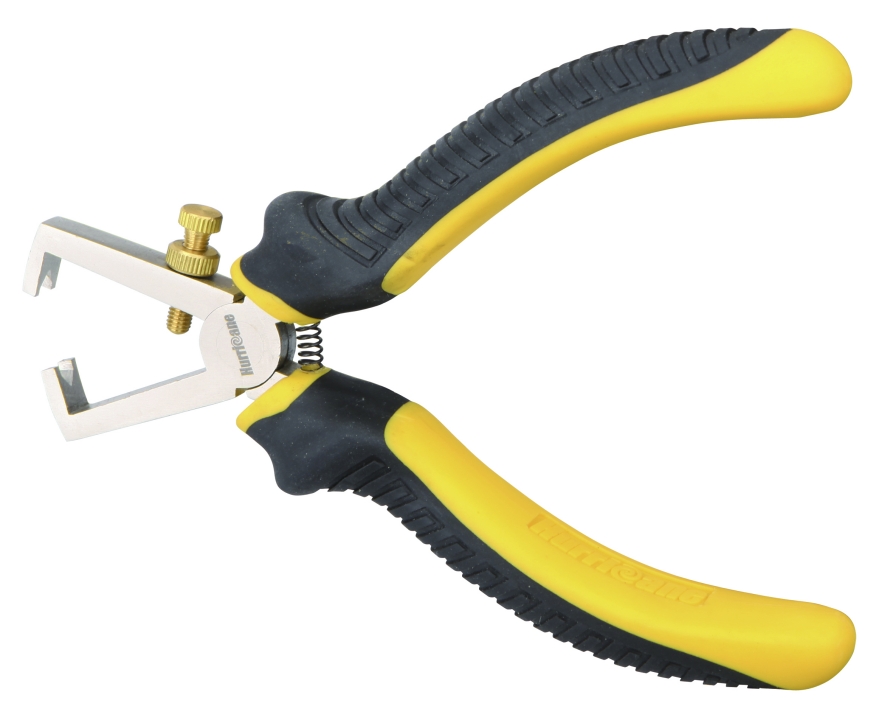
What Is a Wire Stripper?
A wire stripper is a handheld electrical tool designed to remove the insulation from electrical wires of various gauges without damaging the conductive metal inside them.
The tool typically consists of:
- Calibrated stripping holes for different wire gauges
- Cutting blades
- Gripping handles
An adjustable tension mechanism (in advanced models)
The primary function of the tool is to cleanly separate the insulation from the conductor, leaving the exposed wire ready for connection to terminals, connectors, or splices.
Basic Structure of a Wire Stripper
| Component | Function |
| Stripping Holes | Match the wire gauge for insulation removal |
| Cutting Edge | Cuts wire cleanly when needed |
| Pivot Joint | Provides mechanical leverage |
| Handle Grip | Ensures control and comfort |
| Adjustment Screw | Controls stripping pressure (auto models) |
Wire strippers come in manual, semiautomatic, and automatic variations depending on precision level and workload.
Types of Wire Strippers
Different electrical tasks require different types of wire strippers. Understanding these variations is essential for working efficiently and safely.
Manual wire strippers are the most common type used for residential and light commercial work.
They require:
- Manual alignment of the wire into the correct gauge hole
- Hand pressure to strip the insulation
Advantages:
- Low cost
- High precision control
- Durable and simple design
Limitations:
- Slower for bulk work
- Requires experience to achieve consistent results
Self-adjusting wire strippers
Self-adjusting models automatically grip and strip insulation based on wire size.
They are widely used in:
- Electrical maintenance
- Industrial repair work
- Automotive wiring
Advantages:
- Fast operation
- Reduced user error
- Works across multiple wire sizes
Limitations:
- Higher cost
- Slightly less precision on ultrafine wires
Automatic Wire Strippers
Automatic wire strippers are advanced tools used in production environments.
They can:
- Measure wire gauge automatically
- Strip insulation in one motion
- Maintain consistent strip lengths
Used in:
- Manufacturing plants
- Electronics assembly
- High-volume wiring operations
Specialty Wire Strippers
These are designed for specific applications, such as:
- Fiber optic stripping tools
- Coaxial cable strippers
- Thermal wire strippers
They are essential in the telecommunications and data infrastructure industries.
Understanding Wire Gauge and Why It Matters
Before using a wire stripper, understanding wire gauge is critical.
Wire gauge refers to the diameter of the conductor, commonly measured using the AWG (American Wire Gauge) system.
Incorrect gauge selection can result in:
- Damaged conductors
- Weak electrical connections
- Overheating circuits
Common Wire Gauge Reference Table
| AWG Size | Diameter (mm) | Typical Use |
| 10 AWG | 2.59 mm | Heavy appliances |
| 12 AWG | 2.05 mm | Household outlets |
| 14 AWG | 1.63 mm | Lighting circuits |
| 16 AWG | 1.29 mm | Lowpower devices |
| 18 AWG | 1.02 mm | Electronics |
| 22 AWG | 0.64 mm | Signal wiring |
Proper matching between wire gauge and stripper slot ensures clean insulation removal without conductor damage.
How Wire Strippers Work (Mechanical Principle)?
Wire strippers operate using a controlled compression-cutting mechanism.
When the user squeezes the handles:
The jaws close around the insulation, the cutting edges penetrate only the outer insulation layer, the tool grips and pulls the insulation away from the conductor, and the metal wire remains intact.
The key engineering principle is differential hardness:
The insulation is softer than the metal conductor, and the cutting edges are calibrated to avoid penetrating the conductor. This principle is supported by electrical safety standards such as IEC 60228, which defines conductor integrity requirements.
Step-by-Step Guide: How to Use Wire Strippers Correctly
This section outlines the professional workflow used by electricians.
Step 1: Identify wire type and gauge
Before stripping:
- Determine the AWG size.
- Identify the insulation type (PVC, rubber, or Teflon).
- Check whether the wire is solid or stranded.
Incorrect identification can damage the conductor.
Step 2: Select the correct stripping slot
Insert the wire into the appropriately sized hole on the wire stripper.
The fit should be:
- Snug but not tight
- Aligned without force
If the wire is too loose or too tight, choose another slot.
Step 3: Position the wire properly
Insert approximately:
5–10 mm of insulation into the stripping jaws.
Ensure the wire is straight with no bending at the entry point.
Step 4: Apply controlled pressure
Gently but firmly squeeze the handles.
Avoid:
- Excessive force (this damages the conductor)
- Partial squeezing (this causes uneven stripping)
Step 5: Pull the insulation cleanly
Once the insulation is cut:
Pull the stripper backwards or away and remove the insulation smoothly. The conductor should remain intact and shiny.
Step 6: Inspect the wire
Check for:
- No copper cuts
- No strand breakage
- A clean insulation edge
If any damage is present, recut and strip again.
Common Mistakes When Using Wire Strippers
Even experienced technicians make mistakes.
Using the wrong gauge slot can lead to:
- Cut strands
- Weak conductivity
Overstripping wire
Exposing too much of the conductor increases the risk of:
- Short circuit risk
- Oxidation exposure
Twisting Wire After Stripping
Twisting wire after stripping can damage stranded conductors.
Using dull blades
Old tools may:
- Tear insulation
- Crush the conductor
Applying excess force
This is one of the most common causes of conductor damage.
Safety Guidelines When Using Wire Strippers
Electrical safety standards emphasize proper handling.
According to NFPA 70E, key precautions include:
Ensure wires are not live before stripping
Wear insulated gloves in industrial environments
Use tools rated for electrical work
Avoid working in wet environments
Safety Checklist Table
| Safety Step | Requirement |
| Power Off | Mandatory |
| PPE Gloves | Recommended |
| Dry Environment | Required |
| Tool Condition Check | Required |
| Proper Lighting | Recommended |
Applications of Wire Strippers Across Industries
Wire strippers have many applications beyond electrical installation.
Electrical construction
- Building wiring
- Circuit installation
- Panel assembly
Automotive industry
- Sensor wiring
- Battery connections
- ECU harnesses
Electronics manufacturing
- PCB assembly
- Microwiring systems
Telecommunications
- Fibre optic cable preparation
- Data cable stripping
- Aerospace and defence
- High-precision wiring systems
- Lightweight electrical systems
Advanced Wire Stripping Techniques Used by Professionals
Once the fundamentals of using a wire stripper have been mastered, professional electricians and technicians will rely on more advanced techniques to enhance speed, precision, and the long-term reliability of connections. These methods are particularly important in industrial environments where wiring density is high, and the tolerance of electrical failure is extremely low.
Controlled Strip Length Technique
In professional electrical work, consistency matters more than speed alone. One key practice is to maintain a standardised strip length depending on the type of connector.
- Screw terminals: 6–8 mm
- Wire nuts: 10–12 mm
- Ferrules: 5–7 mm
- PCB insertion: 3–5 mm.
Electricians often mark reference lengths on their wire strippers or use built-in stop gauges. This ensures that every stripped wire fits perfectly into the terminals without being overexposed.
Multistrand handling technique
Stranded copper wire requires additional care. Instead of twisting after stripping, as amateurs often do, professionals:
- Allow natural strand alignment;
- Use ferrules when necessary;
- Avoid compression damage at the tip.
This improves conductivity stability and reduces resistance fluctuations over time.
Sequential Bundled Stripping
In industrial wiring harness production, multiple wires are stripped in sequence.
- Cut the wires to an equal length.
- Align the bundle.
- Strip in a controlled batch order.
- Inspect for consistency.
This reduces assembly time while maintaining quality uniformity.
Troubleshooting Common Wire Stripping Problems
Even high-quality tools can cause problems if used incorrectly or if the condition of the wire is poor. The following are real-world problems encountered in electrical work, along with the solutions used by professionals.
Problem 1: Wire stripper cuts through copper
Cause:
- Incorrect gauge selection
- Excess pressure applied
- Dull stripping blades
Solution:
- Use the correct AWG slot.
- Reduce grip force.
- Replace or sharpen the tool.
Problem 2: Insulation Does Not Fully Remove
Cause:
- Insulation is too thick or rubberised
- The tool is not pressed down enough
- Wire is misaligned
Solution:
- Reposition the wire carefully.
- Use a self-adjusting stripper.
- Score the insulation lightly before stripping.
Problem 3: Frayed stranded wire
Cause:
- Twisting the wire after stripping
- Overpulling during the stripping motion
Solution:
- Use ferrules for termination.
- Strip with a smooth pulling motion only.
Problem 4: Inconsistent strip length
Cause:
- Manual estimation
- Lack of stop gauge usage
Solution:
- Use the built-in length stops or mark reference points on the tool.
- Problem 5: Insulation slips without cutting
Cause:
- Worn blades
- Wrong insulation type selected
Solution:
- Replace the blade assembly.
- Use a specialised stripper for Teflon or silicone insulation.
Wire Stripper Maintenance and Care
Proper maintenance significantly increases the lifespan of tools and ensures consistent performance.
Cleaning the tool
Debris and insulation residue may accumulate in the cutting jaws after repeated use.
Recommended cleaning steps:
- Wipe the blades with isopropyl alcohol.
- Use compressed air to remove particles.
- Avoid abrasive cleaning tools.
Lubrication
Pivot joints should be lightly lubricated.
Use machine oil or silicone lubricant.
Apply once every 2–4 weeks in environments where the tool is used frequently.
Blade inspection
Inspect the blades for:
- Dull edges
- Chips or deformation
- Misalignment
Replace blades immediately if performance declines.
- Storage practices
Proper storage prevents damage:
- Keep in dry toolboxes.
- Avoid moisture exposure.
- Store away from corrosive chemicals.
Wire Stripper Buying Guide (Professional Selection Criteria)
Choosing the right wire stripper depends on application, frequency of use, and wire types.
Key Selection Factors
Wire Gauge Range
Ensure tool supports:
- Low voltage electronics (22–26 AWG)
- Household wiring (12–14 AWG)
- Industrial wiring (up to 10 AWG)
Tool Type
| Type | Best For | Skill Level |
| Manual | Precision work | Beginner–Pro |
| Selfadjusting | Mixed wiring | Intermediate |
| Automatic | Production lines | Professional |
Ergonomic Design
Comfort affects longterm productivity:
- Nonslip grip handles
- Spring-loaded operation
- Lightweight frame
Material Quality
High-quality wire strippers use:
- Hardened steel blades
- Anticorrosion coatings
- Reinforced pivot joints
Precision Features
Advanced models include:
- Depth stops
- Adjustable tension control
- Multislot calibration system
Professional Buying Comparison Table
| Feature | Budget Tool | MidRange Tool | Professional Tool |
| Durability | Low | Medium | High |
| Precision | Basic | Good | Excellent |
| Speed | Slow | Moderate | Fast |
| Lifespan | Short | Medium | Long |
| Cost | Low | Moderate | High |
Wire Stripper vs Other Electrical Tools
Understanding how wire strippers differ from similar tools helps avoid misuse.
Wire Stripper vs Cable Cutter
| Feature | Wire Stripper | Cable Cutter |
| Function | Removes insulation | Cuts wire |
| Precision | High | Low |
| Damage Risk | Low | High for stripping |
Wire Stripper vs Utility Knife
Utility knives are sometimes used incorrectly for stripping wires.
| Feature | Wire Stripper | Utility Knife |
| Safety | High | Low |
| Accuracy | High | Low |
| Wire Damage Risk | Minimal | High |
Frequently Asked Questions (FAQ)
- What is a wire stripper used for?
A wire stripper is used to remove insulation from electrical wires without damaging the internal conductor, allowing safe and reliable electrical connections.
- Can I use a knife instead of a wire stripper?
It is not recommended. Knives can damage the conductor, reduce electrical performance, and increase safety risks. Wire strippers provide controlled precision.
- How do I know which wire stripping hole to use?
Match the wire gauge (AWG size) printed on the insulation to the corresponding labeled hole on the wire stripper.
- Do wire strippers damage wires?
Proper use does not damage wires. Damage usually occurs due to incorrect sizing, excessive force, or worn-out blades.
- What is the difference between manual and automatic wire strippers?
Manual strippers require user selection of gauge and pressure, while automatic strippers self-adjust to wire size and remove insulation in one motion.
- How often should wire strippers be replaced?
With proper maintenance, high-quality wire strippers can last several years. Replacement is needed when blades become dull or when alignment is compromised.
Conclusion
The wire stripper is one of the most essential yet underestimated tools for electrical work. Its role extends far beyond simply removing insulation — it directly affects electrical safety, conductivity efficiency, and the long-term reliability of systems.
Proper use of wire strippers ensures strong, safe, and durable electrical connections in everything from household wiring and automotive systems to industrial manufacturing and telecommunications. As electrical systems become more complex, the importance of precision tools increases.
Knowing how to select, use, and maintain a wire stripper correctly improves workmanship and reduces the risk of electrical failure. Whether you are a beginner or a professional electrician, mastering this tool is a fundamental skill in modern electrical engineering practice.